Quickstart
The goal of this document is to get you up and running with a LocalNet, some manually deployed local actors, and sending an end-to-end relay. It will not go in depth into any concepts.
Create a new GitHub issue here if you encounter any problems.
- Deployment Walkthrough
- Video Walkthrough
- 0. Install Dependencies
- 1. Launch & Inspect LocalNet
- 2. Fund New Accounts
- 3. Manually Stake a Supplier & Deploy a RelayMiner
- 4. Manually Stake an Application & Deploy a PATH Gateway
- 5. Send A Relay
- 6. Dynamically Scaling LocalNet
- 7. Explore the tools
Deployment Walkthrough
This quickstart guide is intended for setting up your local environment for development purposes.
If you want to deploy your own Gateway and Supplier, please follow the instructions in our poktroll-docker-compose-example example.
If you want to deploy a Supplier & Gateway via a copy-pasta method without understanding anything, see the instructions here.
Video Walkthrough
You can access the video here.
0. Install Dependencies
Install the following dependencies:
- Golang - The programming language we use to implement the protocol
- Docker - Containerization tool
- Ignite - Cosmos SDK CLI for building and deploying blockchains
- Kind - k8s local cluster manager
- Helm - k8s configuration and automation tool
- Tilt - k8s local development tool & environment manager
If you've followed the LocalNet instructions, you may already have them installed.
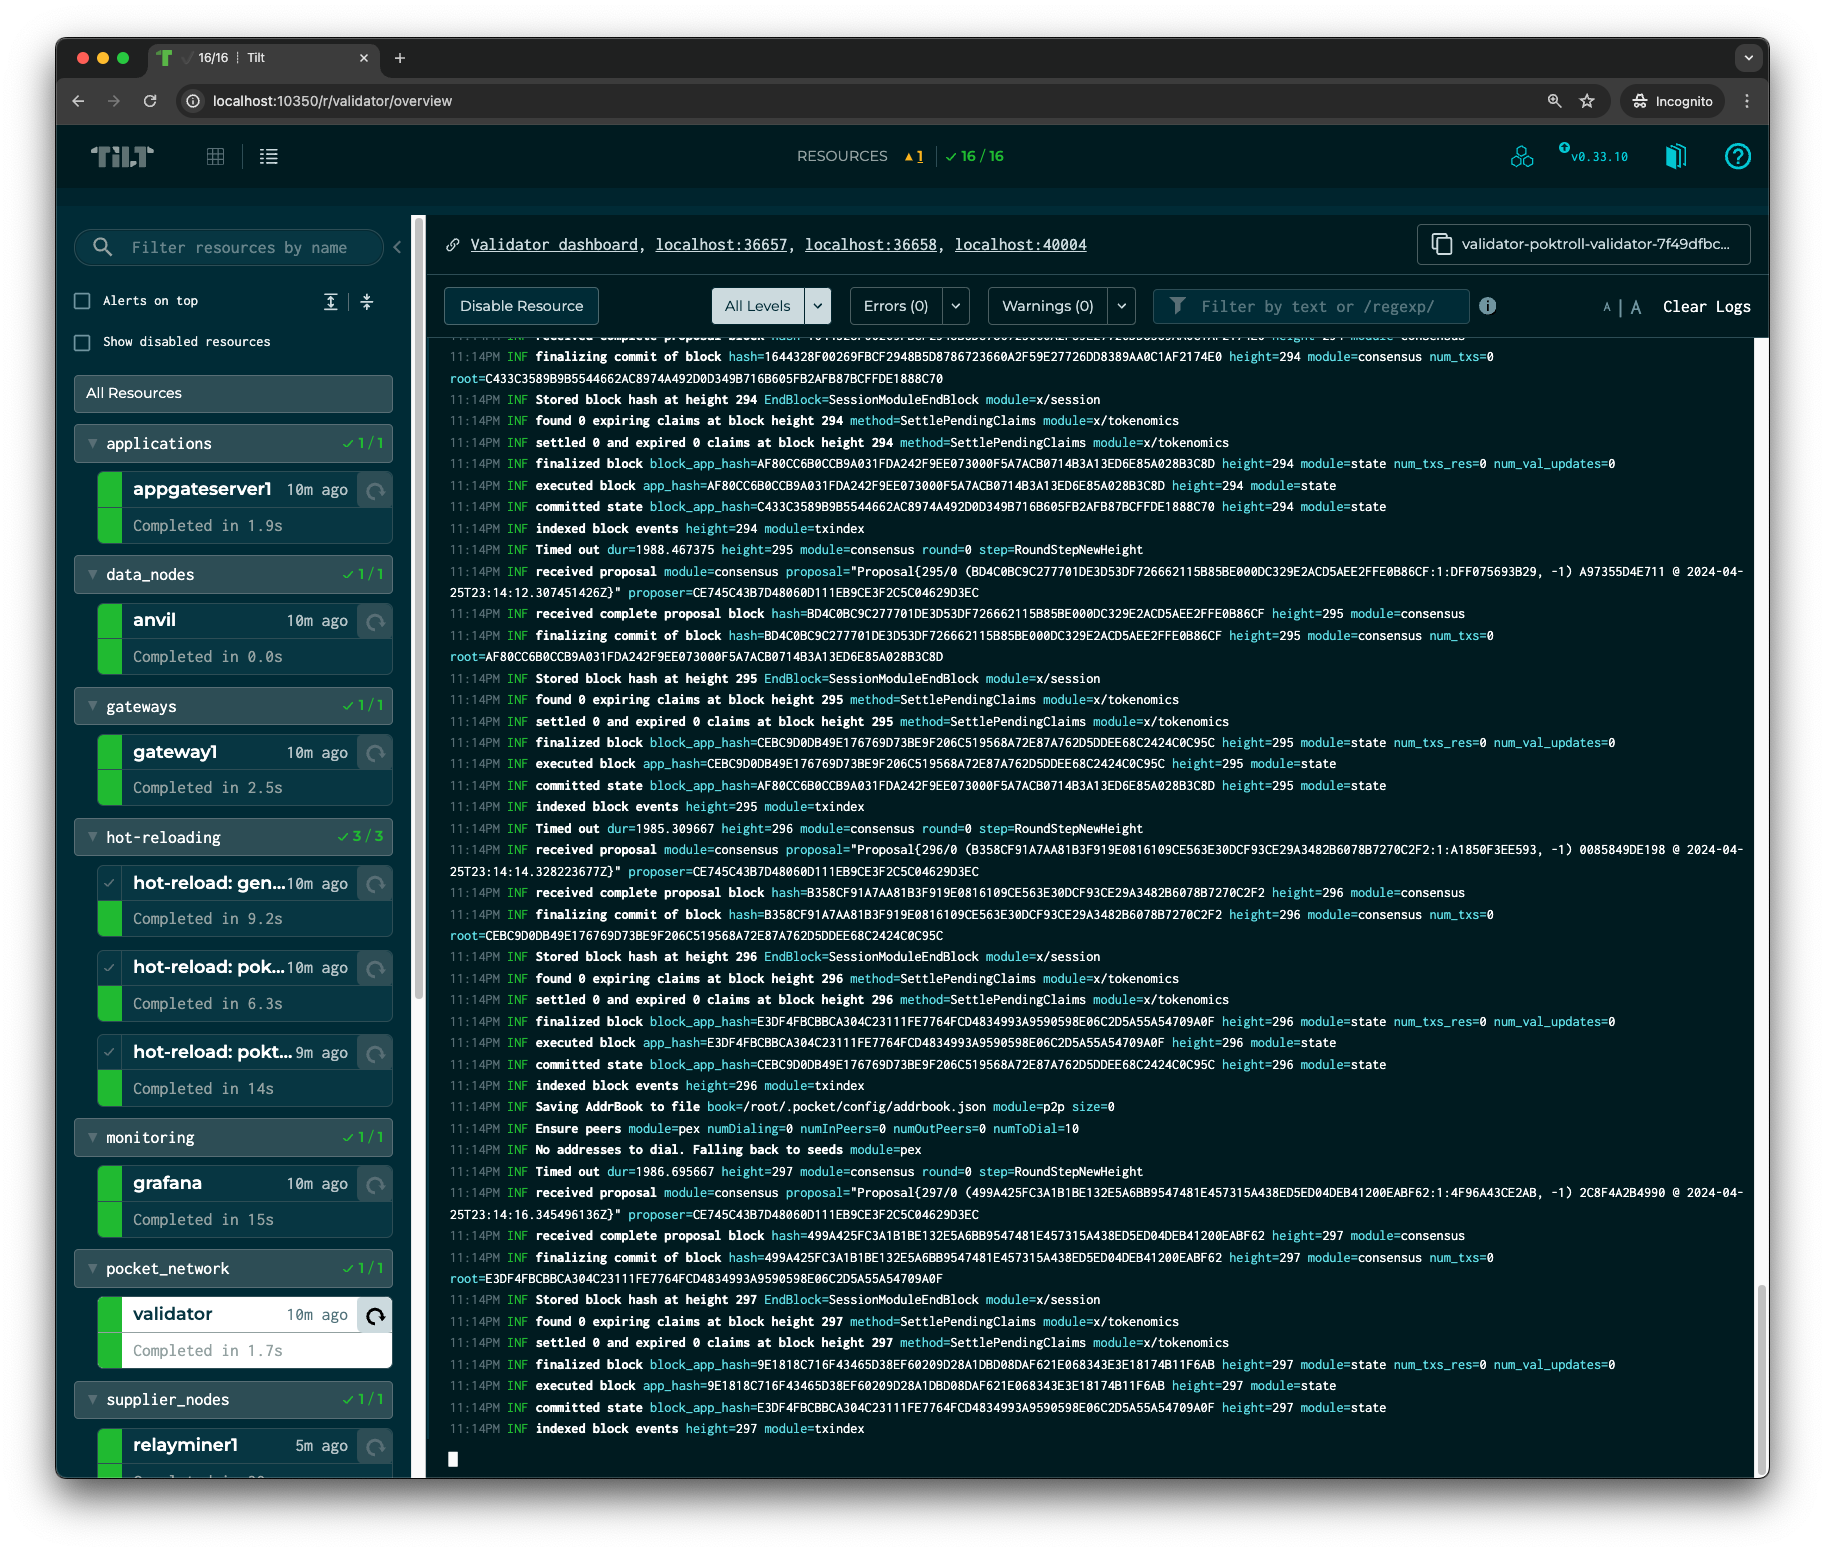
1. Launch & Inspect LocalNet
This section will help you deploy a POKT LocalNet in a k8s cluster on your machine and inspect it so you have an idea of what's going on!
We'll be manually configuring a few actors to run in your shell for the sake of the tutorial so you have visibility into the types of on-chain and off-chain actors. In practice, you should be using localnet to dynamically scale your actors.
To learn more about the different actors type, see the docs here.
It should look something like this once you're past the first section:
1.1 Clone the poktroll repository
git clone https://github.com/pokt-network/poktroll.git
cd poktroll
1.2 See all the available helper commands in Makefile
We leverage the Makefile to abstract the complexity of some common commands,
but you can view it directly
to see what the underlying command being executed is.
make helpIf you run make help from the root of the repo, you'll see a list of all the
available commands. Looking inside the Makefile is a great way to learn how to use them!
1.3 Prepare your development environment
Run the following command to install golang dependencies:
make install_ci_deps
If you encounter issues related to mockgen not being found or failing, try running the following command to verify its installation:
make check_mockgen
Compile protobufs, generate mocks and verify that all tests are passing by running:
make go_develop_and_test
There are some flaky tests, so you can re-run with the following command without needing to regenerate the mocks and types:
make test_all
1.4 Create a k8s cluster
Create a new k8s cluster for your LocalNet:
kind create cluster
If you use k8s for other things, you may need to switch your context as well:
kubectl config use-context kind-kind
1.5 Start up LocalNet
Bring up your LocalNet and wait a few minutes:
make localnet_up
Visit localhost:10350 and wait until all the containers are 🟢
If everything worked as expected, your screen should look similar to the following:
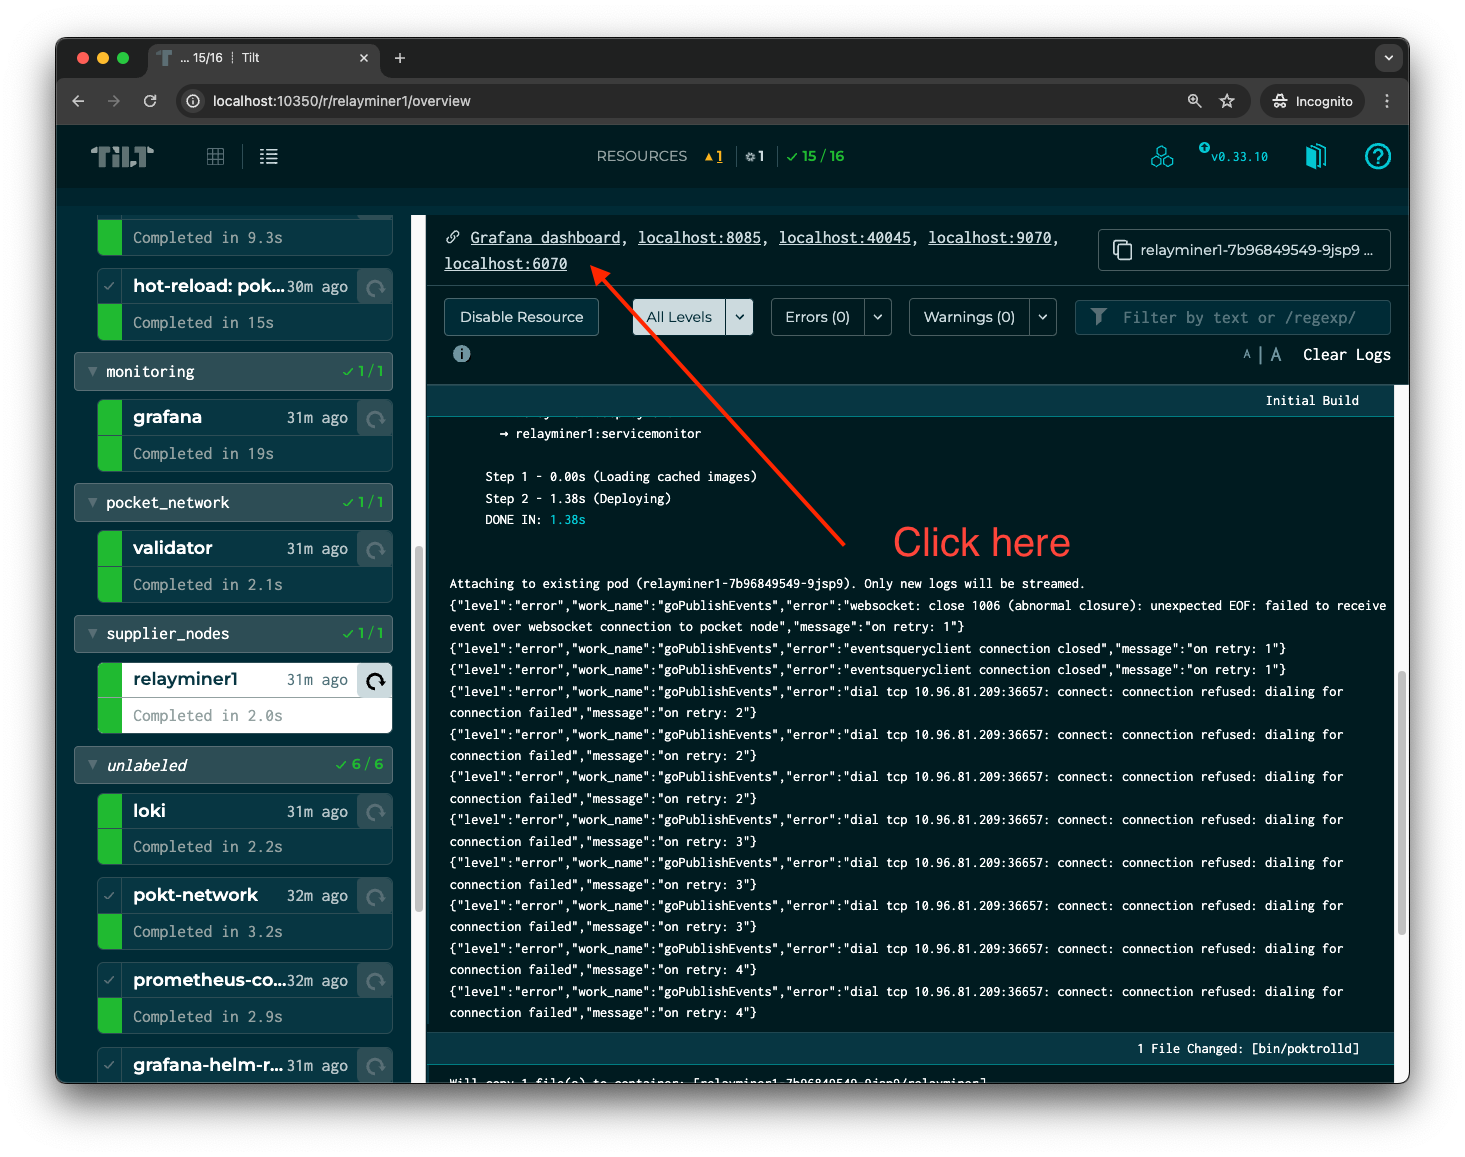
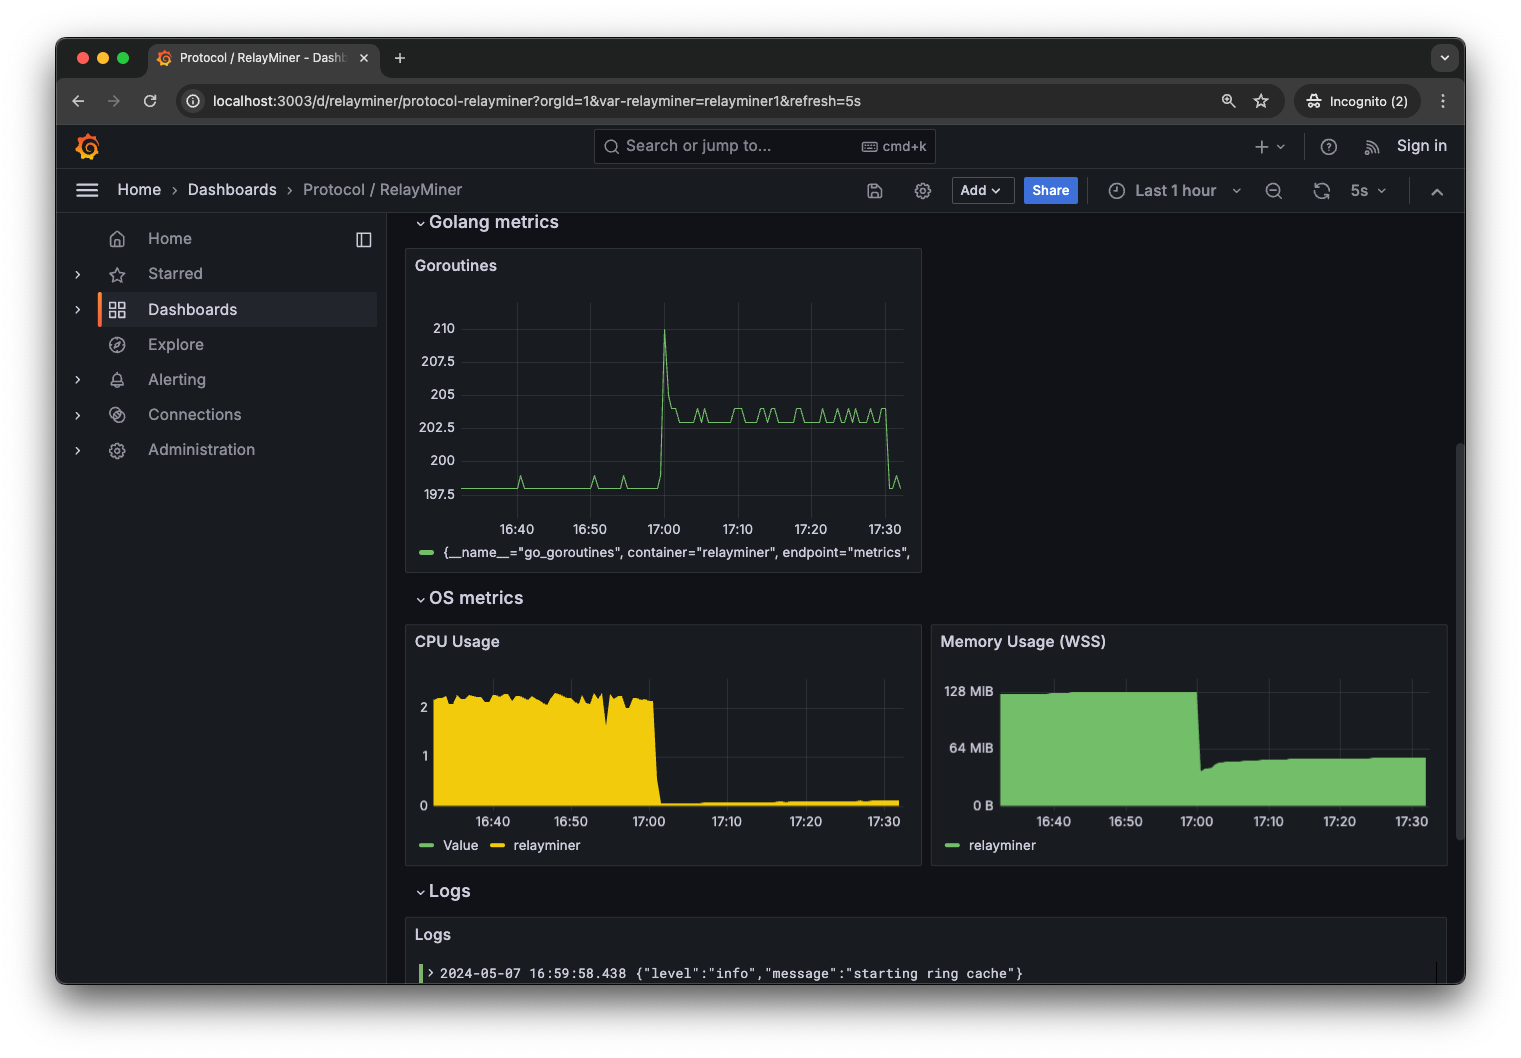
1.6 View Grafana Logs
Every actor has a local grafana dashboard associated with it.
For example, if you visit the RelayMiner Tilt UI, you can click in the top left corner to view its grafana dashboard.
1.7 Check the status of the blockchain
You can query the status of the blockchain using poktrolld by running:
poktrolld status --node=tcp://127.0.0.1:26657 | jq
Alternatively, you use the CometBFT status directly at:
curl -s -X POST localhost:26657/status | jq
Or at latest block at:
curl -s -X POST localhost:26657/block | jq
For example, you can get the height of the blockchain by visiting the Validator Grafana Dashboard or from the CLI like so:
curl -s -X POST localhost:26657/block | jq '.result.block.last_commit.height'
2. Fund New Accounts
This section will help you fund a few accounts that we'll use below. We're going
to create a shannon_supplier and shannon_application, but a dedicated gateway
is outside the scope of this guide.
2.1 Create a Shannon Supplier Account
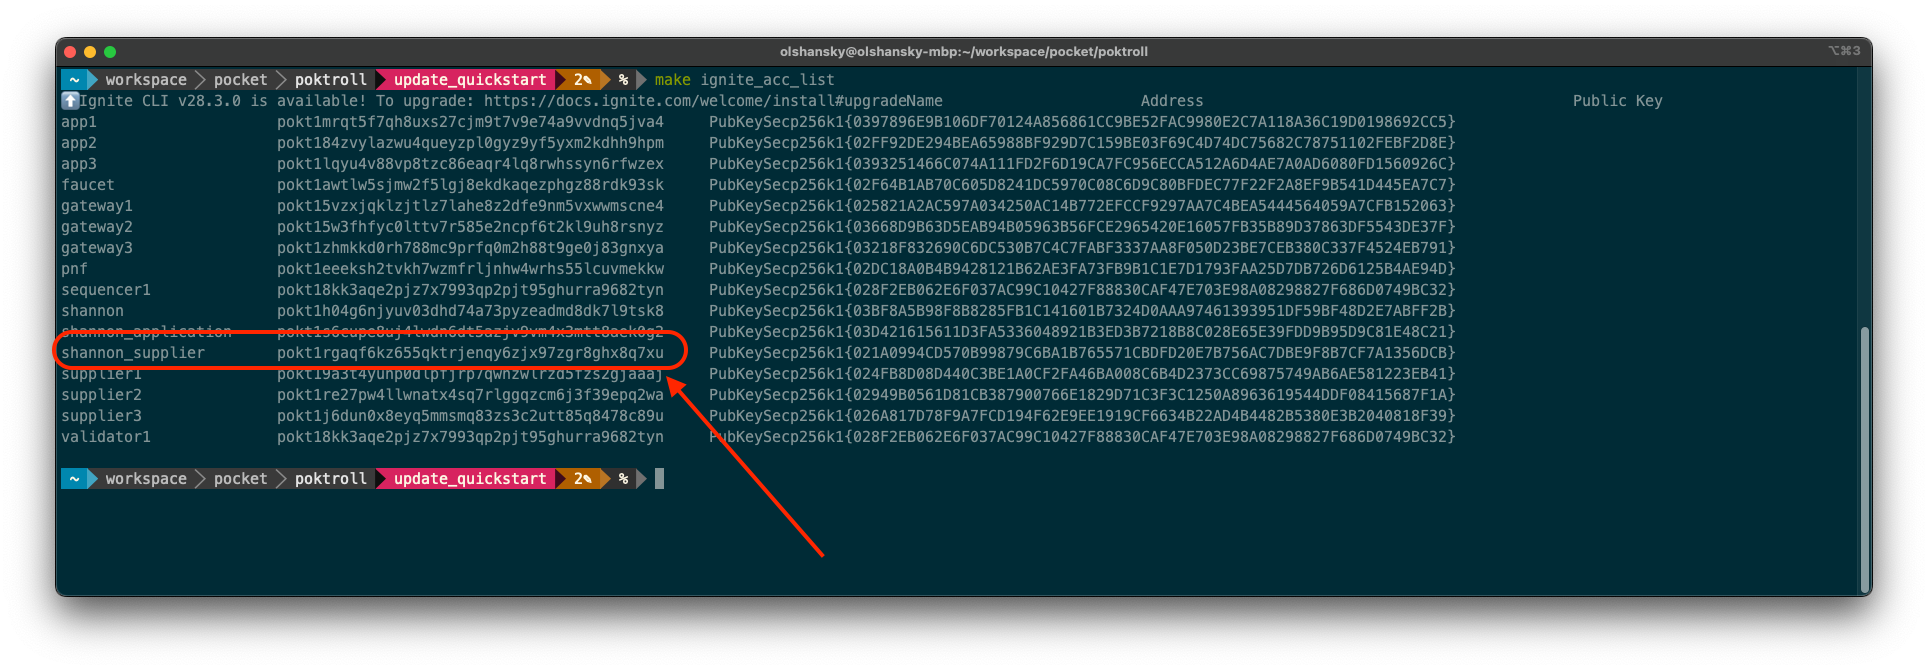
List all the accounts we get out of the box by running:
make ignite_acc_list
And create a new account named shannon_supplier by running:
ignite account create shannon_supplier \
  --keyring-dir=./localnet/poktrolld \
  --keyring-backend test
If you re-run make ignite_acc_list, you should now see shannon_supplier in the list.
Make sure to note its address under the Address column and export it as an
environment variable for convenience. For example:
export SHANNON_SUPPLIER=pokt1rgaqf6kz655qktrjenqy6zjx97zgr8ghx8q7xu
2.2 Create a Shannon Application Account
Let's do the same thing for a shannon_application:
ignite account create shannon_application \
  --keyring-dir=./localnet/poktrolld \
  --keyring-backend test
export SHANNON_APPLICATION=pokt1s6cupe8uj4lwdn6dt5azjv9vm4x3mtt8aek0g2
2.3 Fund your Supplier Account
Query your supplier's balance by running:
make acc_balance_query ACC=$SHANNON_SUPPLIER
And you should see an empty balance:
~ Balances ~
balances: []
pagination: {}

~ Spendable Balances ~
Querying spendable balance for pokt1h04g6njyuv03dhd74a73pyzeadmd8dk7l9tsk8
balances: []
pagination: {}
But if you look in our genesis file (./localnet/poktrolld/config/genesis.json)
you'll find that you actually have direct access to the faucet!
You can send some uPOKT to your shannon_supplier by running:
poktrolld \
  tx bank send \
  faucet $SHANNON_SUPPLIER 420000000000069upokt \
  --node tcp://127.0.0.1:26657 \
  --home=./localnet/poktrolld
And you'll find that shannon_supplier is now rolling in POKT:
balances:
  - amount: "420000000000069"
    denom: upokt
pagination:
  next_key: null
  total: "0"
2.4 Fund your Application Account
Let's do the same thing for the shannon_application:
poktrolld \
  tx bank send \
  faucet $SHANNON_APPLICATION 420000000000069upokt \
  --node tcp://127.0.0.1:26657 \
  --home=./localnet/poktrolld
And make sure to check its balance again:
make acc_balance_query ACC=$SHANNON_APPLICATION
3. Manually Stake a Supplier & Deploy a RelayMiner
As we mentioned earlier, if you want to understand the different on-chain actors and off-chain operators in POKT Network, look at the docs here.
If you just want to follow instructions to make things work and get your hands dirty, keep reading.
3.1 View existing suppliers
You can run the following command to see all the suppliers available in the network:
make supplier_list
You'll find that we have a default supplier, but SHANNON_SUPPLIER won't be there yet.
3.2 Preparing your backend data node
We need a blockchain node (i.e. a backend data node) backend data node to
configure a supplier. Since LocalNet is already has a running anvil service, we can re-use that as our backend.
anvil is a local Ethereum development node that's equivalent to "running your own ETH node". It's a great way to test.
You can verify the anvil node is running with the following curl:
curl http://localhost:8547 \
  -X POST \
  -H "Content-Type: application/json" \
  --data '{"method":"eth_blockNumber","params":[],"id":1,"jsonrpc":"2.0"}'
{ "jsonrpc": "2.0", "id": 1, "result": "0x61" }
If you'd prefer to use a real blockchain node with production data for testing, you can provision one at grove.city and use it below.
3.3 Create a Supplier configuration
You can learn more about our supplier configs here.
The following is an example config to get you started:
cat <<EOF >> shannon_supplier_config.yaml
owner_address: pokt1h04g6njyuv03dhd74a73pyzeadmd8dk7l9tsk8
operator_address: pokt1h04g6njyuv03dhd74a73pyzeadmd8dk7l9tsk8
stake_amount: 1000069upokt
services:
  - service_id: anvil
    endpoints:
      - publicly_exposed_url: http://localhost:6942
        rpc_type: JSON_RPC
EOF
3.4 Stake the new Supplier
Stake the shannon_supplier on-chain:
poktrolld \
  tx supplier stake-supplier \
  --config shannon_supplier_config.yaml \
  --keyring-backend test \
  --from shannon_supplier \
  --node tcp://127.0.0.1:26657 \
  --home=./localnet/poktrolld \
  --yes
And verify that the supplier is now staked with:
poktrolld query supplier show-supplier $SHANNON_SUPPLIER --node tcp://127.0.0.1:26657
3.4 Prepare the RelayMiner configuration
Next, we need to prepare a RelayMiner to operate on behalf of the Supplier.
You can learn more about our relay miner configs here.
The following is an example config to get you started:
cat <<EOF >> shannon_relayminer_config.yaml
default_signing_key_names: [ "shannon_supplier" ]
smt_store_path: $HOME/.poktroll/smt
metrics:
  enabled: true
  addr: :9999 # you may need to change the metrics server port due to port conflicts.
pocket_node:
  query_node_rpc_url: tcp://127.0.0.1:26657
  query_node_grpc_url: tcp://127.0.0.1:9090
  tx_node_rpc_url: tcp://127.0.0.1:26657
suppliers:
  - service_id: anvil
    listen_url: http://localhost:6942
    service_config:
      backend_url: http://localhost:8547
      publicly_exposed_endpoints:
        - localhost
pprof:
  enabled: false
  addr: localhost:6060
EOF
3.5 Start the RelayMiner locally
Start the RelayMiner locally:
poktrolld relayminer \
  --config ./shannon_relayminer_config.yaml \
  --keyring-backend test \
  --home=./localnet/poktrolld
Leave it running in its own shell instance and open a new one. We'll be using it to serve relays in the next section.
You may need to re-export SHANNON_APPLICATION and SHANNON_SUPPLIER in the
new shell instance.
4. Manually Stake an Application & Deploy a PATH Gateway
This section will show how to deploy a PATH Gateway in Centralized mode,
which will use its configured (i.e. owned) Applications to sign relays.
Other types of Gateways (e.g. Delegated) are outside the scope of this Quickstart guide.
4.1 View Existing Application
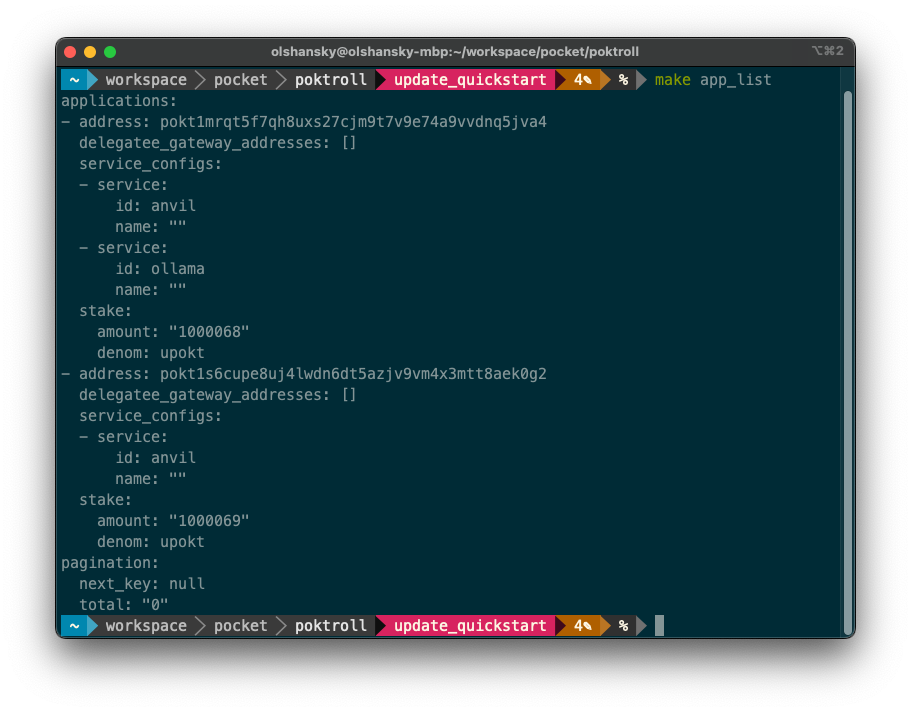
You can run the following command to see all the application available in the network:
make app_list
4.2 Create an Application configuration
You can learn more about our application configs here.
The following example should get you started:
cat <<EOF >> shannon_app_config.yaml
stake_amount: 1000069upokt
service_ids:
 - anvil
EOF
4.3 Stake the new Application
Stake the application on-chain:
poktrolld --home=./localnet/poktrolld \
  tx application stake-application \
  --config shannon_app_config.yaml \
  --keyring-backend test \
  --from shannon_application \
  --node tcp://127.0.0.1:26657 \
  --yes
And verify that the application is now staked with:
poktrolld query application show-application $SHANNON_APPLICATION --node tcp://127.0.0.1:26657
You can also you re-run, make app_list you should see that SHANNON_APPLICATION is now staked as an app:
4.4 Prepare the PATH Gateway Configuration
You can learn more about our PATH Gateway configs here.
5. Send A Relay
Now that we've staked an Application, are running a PATH Gateway, staked
a Supplier, and are running a RelayMiner, we can send a relay!
You must run make acc_initialize_pubkeys before sending a relay in order for
the public keys to be initialized correctly.
See the x/auth for more information on how public keys are stored and accessible on-chain.
5.1 Send a relay on Shannon
You can use curl
curl -X POST -H "Content-Type: application/json" \
  --data '{"jsonrpc":"2.0","method":"eth_blockNumber","params":[],"id":1}' \
  http://anvil.localhost:3000/v1
If everything worked as expected, you should see output similar to the following:
{"jsonrpc":"2.0","id":1,"result":"0x61"}%
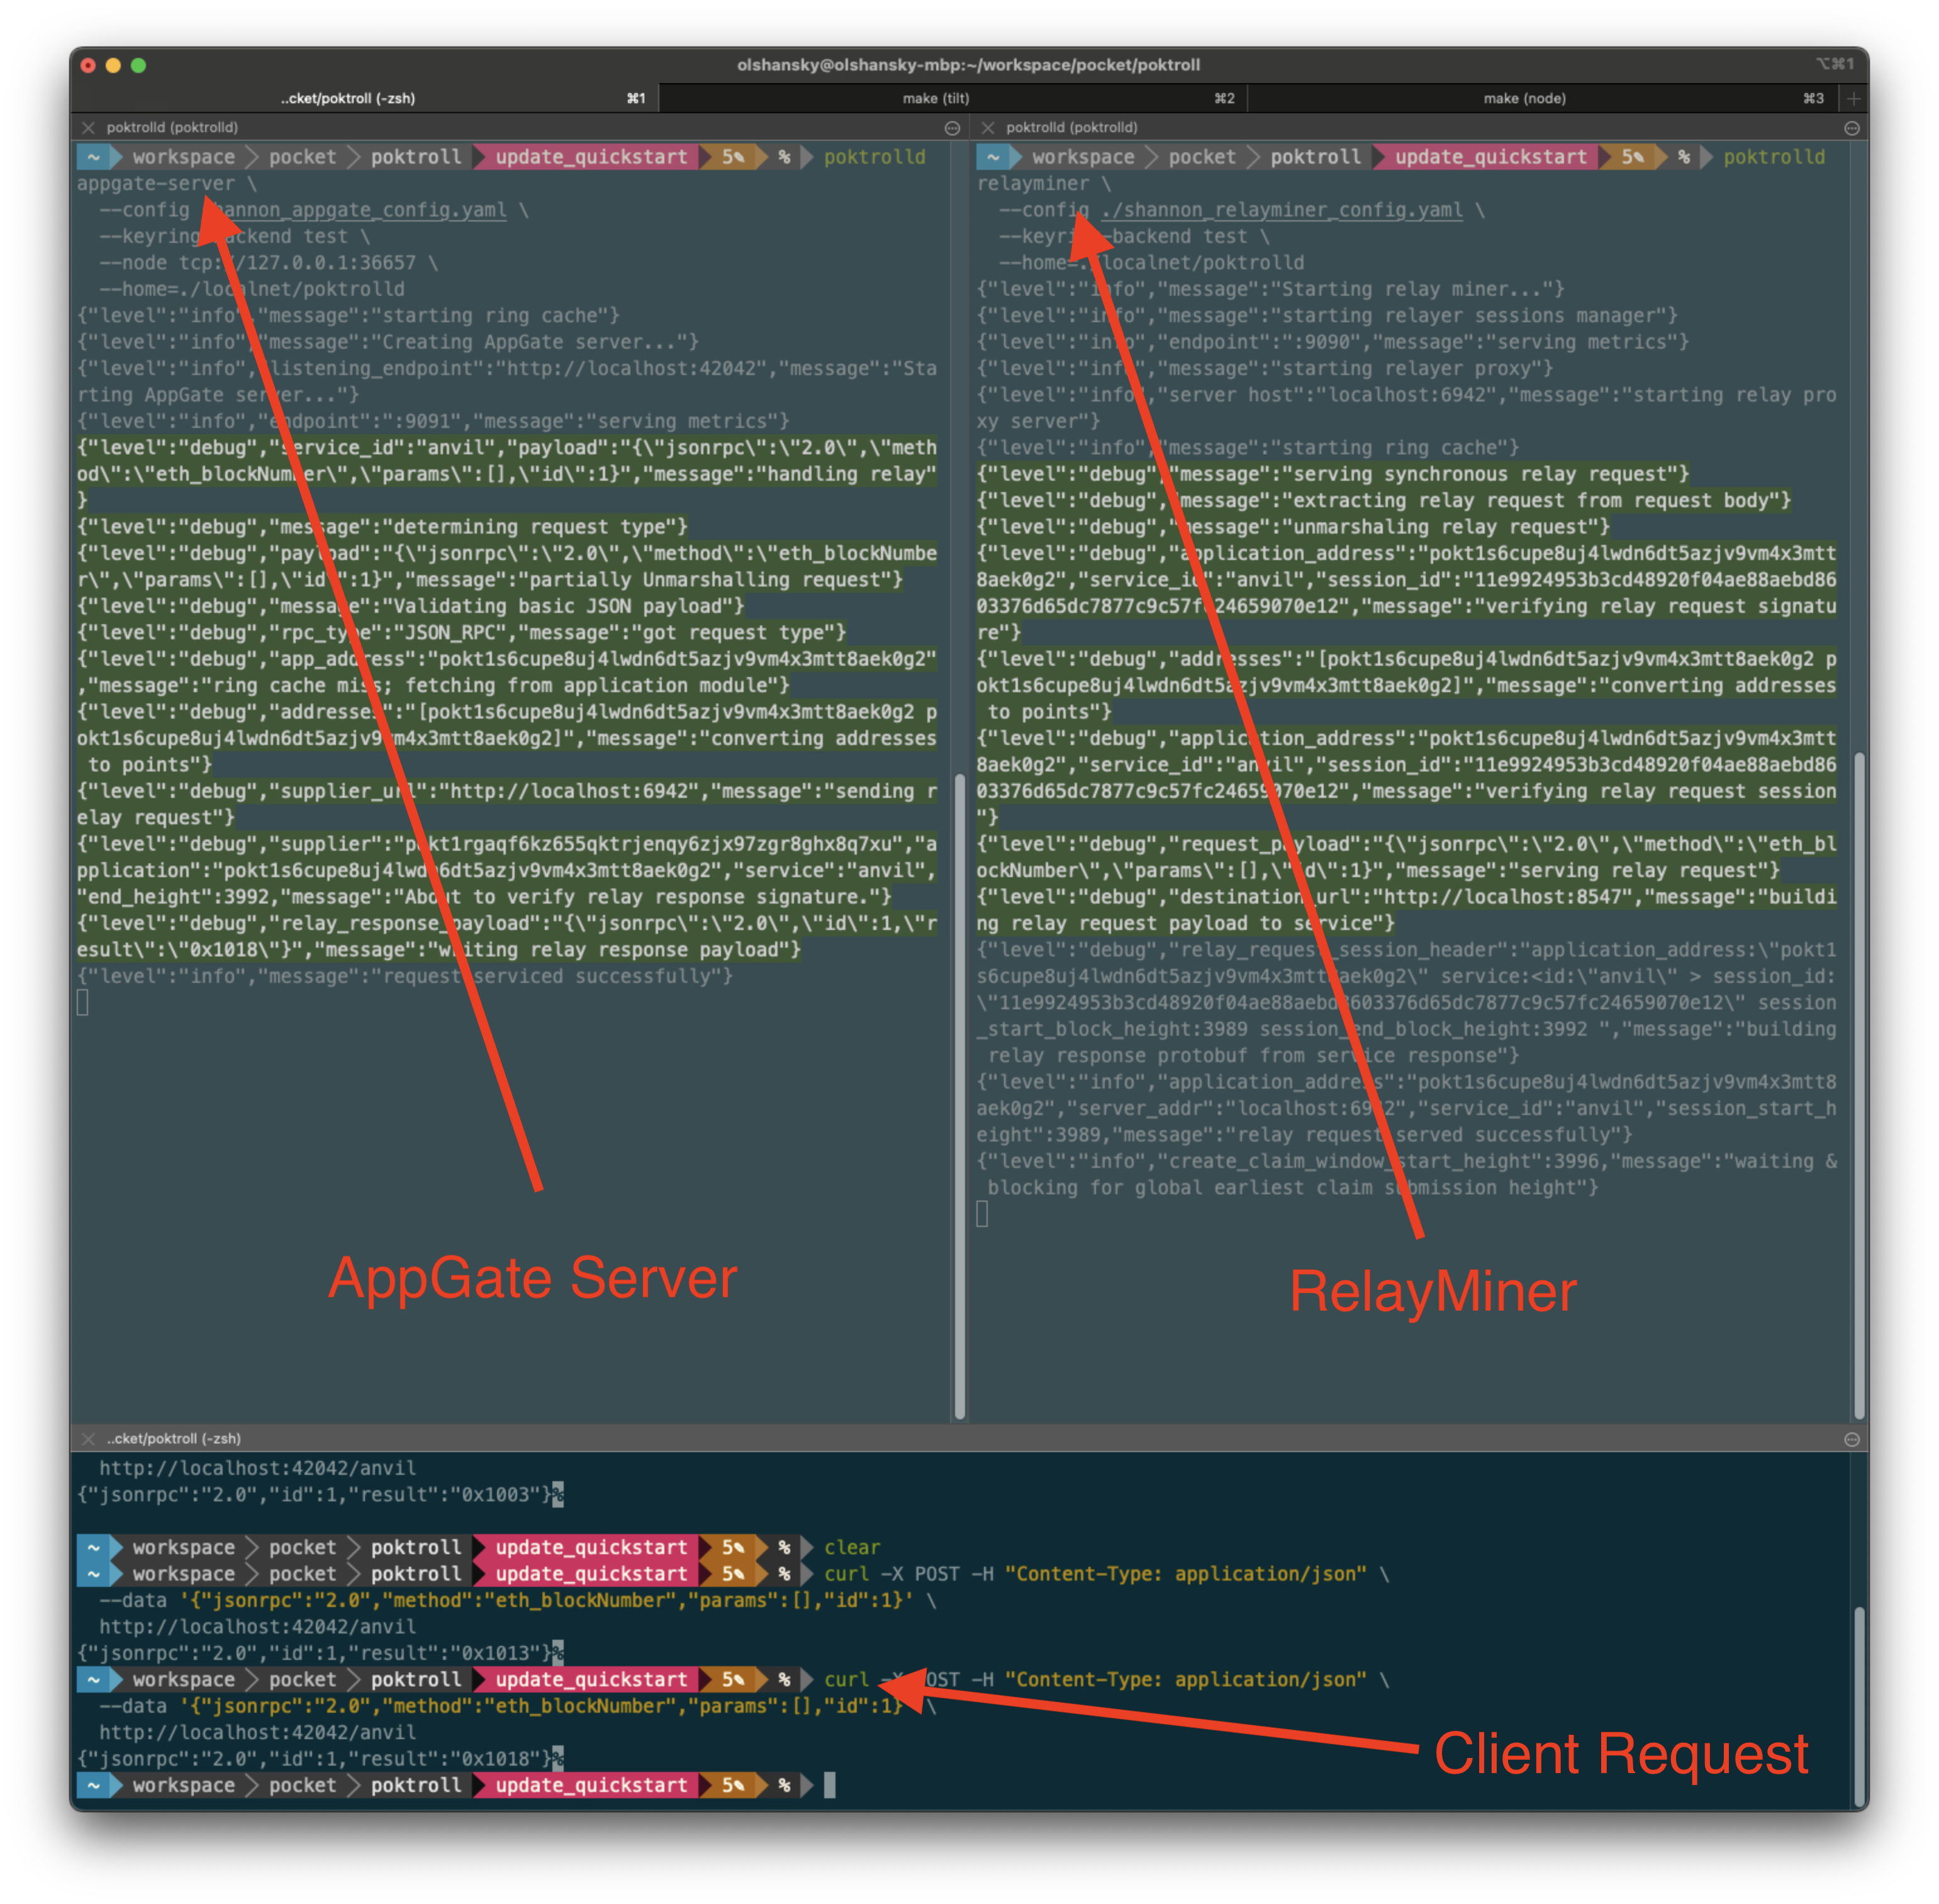
5.2 What just happened?
The Relay Request/Response from is captured in the sequence diagram below.
5.3 What will happen later
Please see our protocol docs here for information on how the protocol actually works, but the following will provide some intuition:
5.4 Staking a few more Suppliers without RelayMiners
Even though we are running our own RelayMiner backed by our own Supplier, we can stake a few more suppliers to diversify where the requests are going to go.
Try using the following helpers:
make supplier2_stake
make supplier3_stake
Running make supplier_list should now show that all three suppliers are staked.
You can reuse the running PATH Gateway to send requests. Its Quality-of-Service module
will try to handle non-performant suppliers, but you should expect some requests to periodically
fail.
Give it a shot by running the following multiple times:
curl -X POST -H "Content-Type: application/json" \
  --data '{"jsonrpc":"2.0","method":"eth_blockNumber","params":[],"id":1}' \
  http://anvil.localhost:3000/v1
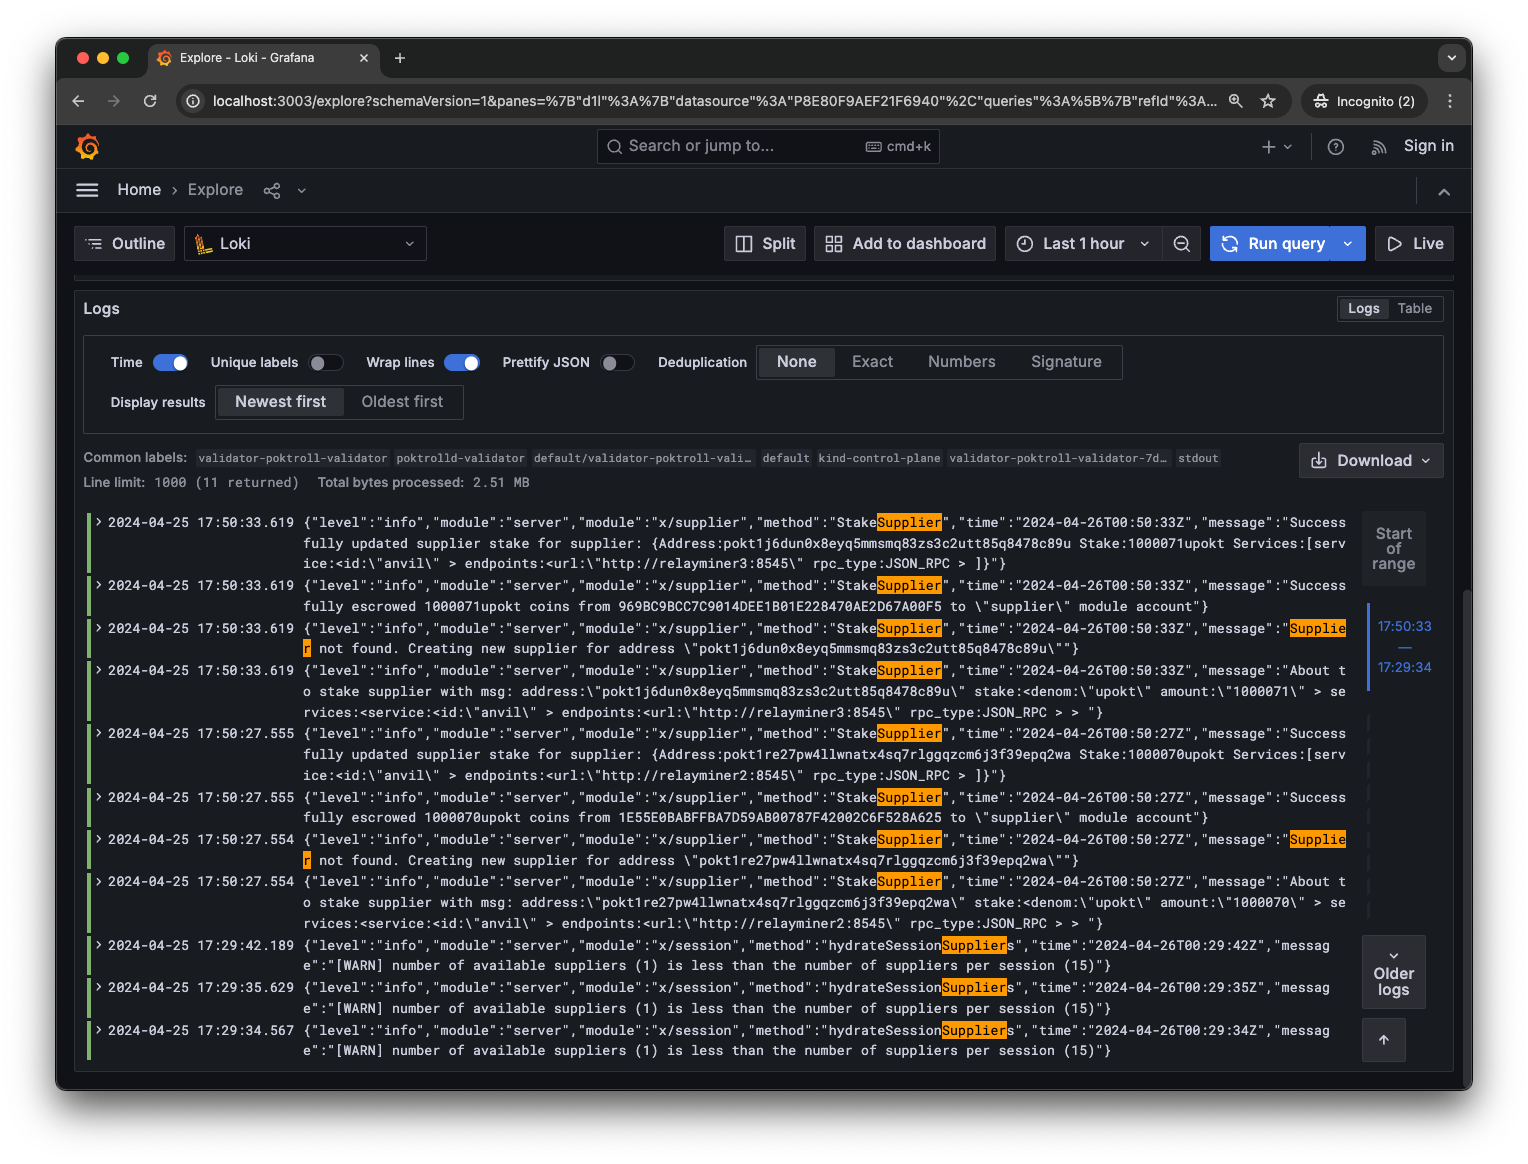
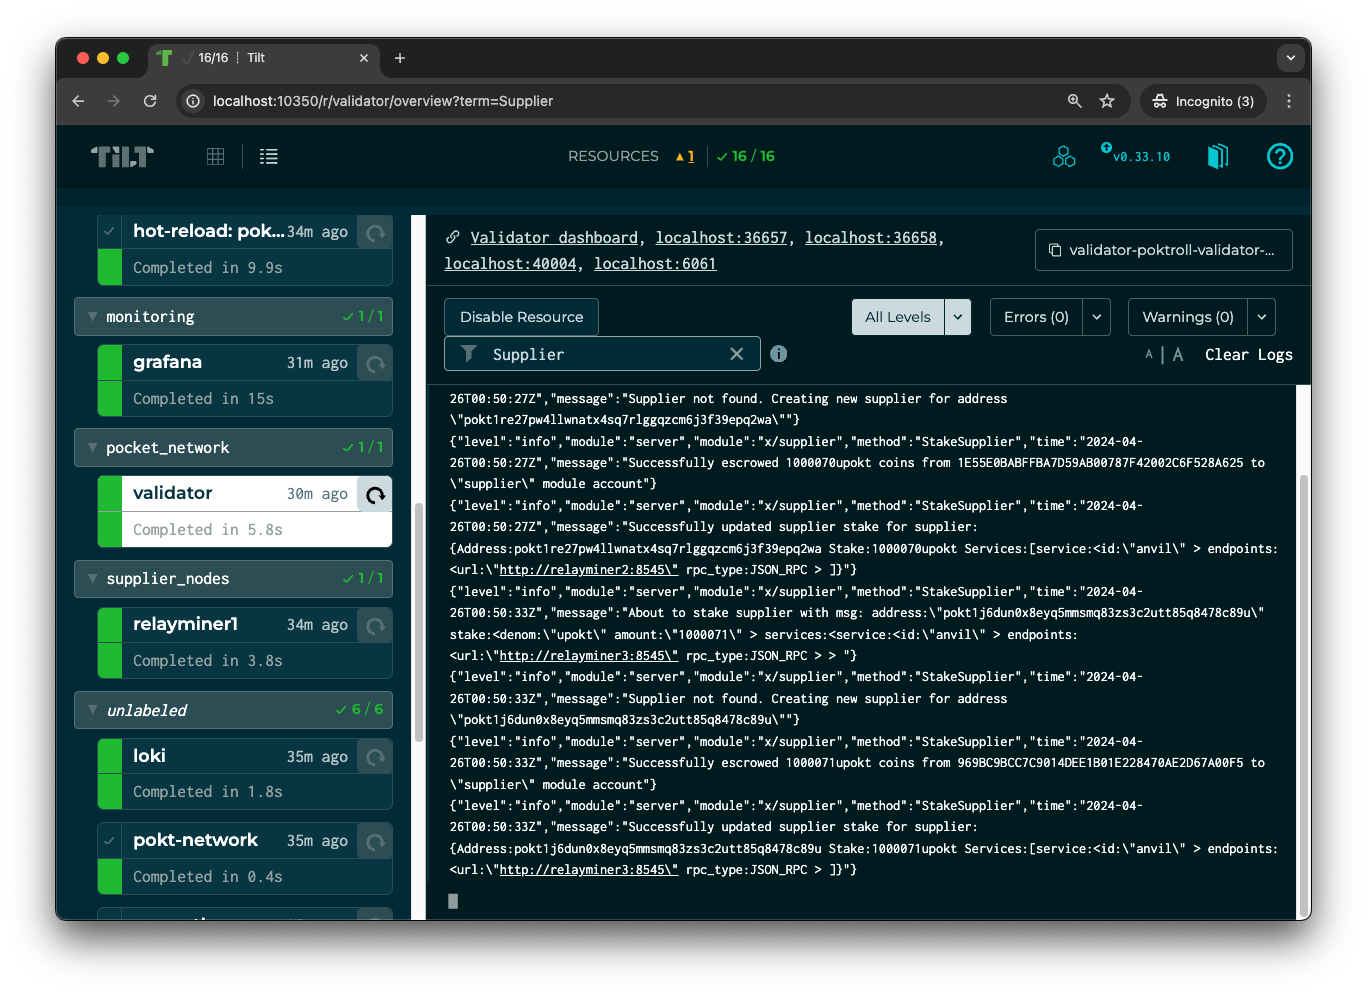
5.5. Inspect the logs
As you're ready to dive in, develop or debug, you can view or inspect logs either through Tilt or Grafana.
Given that we just staked a few suppliers, you customize the query to look for
Supplier either on Grafana or Tilt.
6. Dynamically Scaling LocalNet
We went through a flow of steps above just so you can get a feel for how things work.
That said, you can dynamically scale the number of any actors in LocalNet by ony changing one line!
Go to our localnet tutorial to learn more.
7. Explore the tools
There are three primary tools you'll use to develop and interact with the network:
poktrolld- the POKT Node CLImake- a collection of helpers to make your life easierignite- a tool to manage the local k8s cluster
All of these are extensive and you will likely only need a small subset of their functionality in your day-to-day development. However, knowing of their existence will help you when you need to do something that you haven't done before.
E2E Tests
The e2e package contains a collection of end-to-end tests that leverage
Cucumber & Gherkin. You can execute all of
them with:
make test_e2e
poktrolld
Run poktrolld --help in order to explore all the different. You will likely
spend most of your time with either poktrolld query --help or poktrolld tx --help.
Makefile
Run make in order to see all the helpers our team has developed to
improve our development experience.
Ignite
Run ignite --help in order to explore all the different commands.